Chocolate: Food of the Gods
By Sonia R. Martinez
One of the perks of living in Hawai‘i is we can grow our own chocolate. Yes!
Chocolate is made from cacao, and cacao trees grow very well on our island paradise.
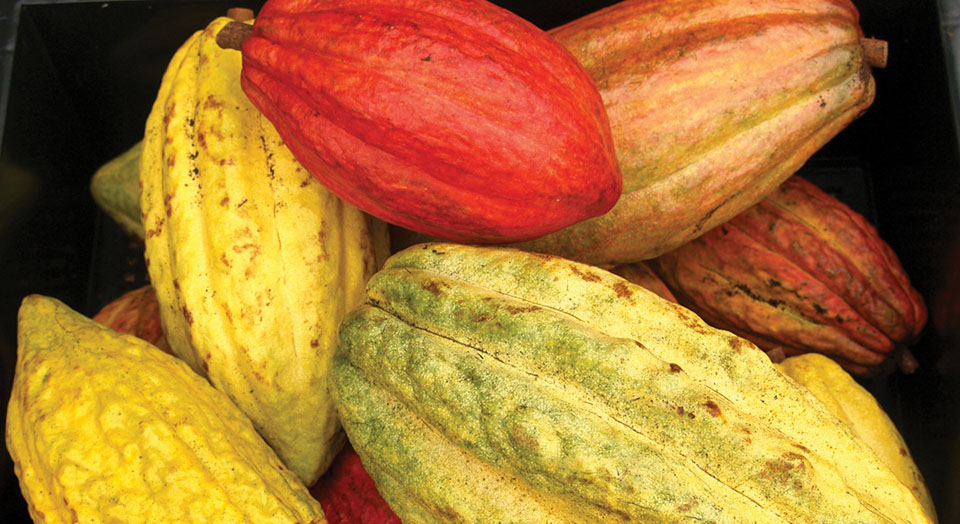
When strolling through the farmers market you might encounter some strange looking ridged pods in bright orange, yellow, or even darkish reds. They are actually Theobroma cacao pods, the seeds or beans from which cocoa and chocolate are made.
The best-known varieties of cacao trees are the Criollo, Forastero, and Trinitario, which is a hybrid mix of both the Criollo and Forastero. There are quite a few farmers growing cacao on this island. Some sell directly to the consumer through the farmers markets and others sell to local companies that make chocolate.
If you decide to grow your own cacao, several farmers might also sell seedlings. Criollo are considered the best chocolate-producing trees.
There are several steps to follow when making chocolate from the cacao seeds. Pods can be harvested approximately every two weeks, and the ripe stage can be red, yellow, orange, or even mixed, depending on the variety of cacao tree.
Harvest: To get the seeds, you must first tap on the pods with one or two sharp blows with a little mallet or hammer and it should open in two halves. You can scoop out the placenta holding the seeds. Each pod can contain anywhere from 30–40 seeds and are covered with a wet and slightly slimy pulp. The seeds need to be placed somewhere they can ‘drain’ the liquor or juice (which is delicious to drink ice cold, by the way) for a day or so. The empty pods can be recycled in the compost pile or used as mulching.
Ferment: After the juices are drained, the seeds or beans need to be moved to another container to ferment for 5–7 days. Turn each day to ensure all of the beans are heating up.
Dry: The beans are turned onto a wire mesh drying rack in a single layer in a well-ventilated area and stirred daily. This can take up to six days, depending on humidity, heat, and air circulation.
Crack: The dried beans need to be ground or cracked. At home, a food processor or even a heavy rolling pin can be used.
The papery husks need to be separated from the nibs. This can be done using a wire mesh colander and a hair dryer when working with small batches.
Roast: A small toaster oven will work well with smaller quantities. Set it to 425˚F and roast for nine minutes, then turn down to 325˚F for another 9 minutes, and finally bring the temperature down to 259˚F for 10 more minutes.
Grind: You can use a peanut butter machine or an old-fashioned meat grinder to grind the nibs into a paste.
Temper: The next step is a bit more complicated, but it can still be done in a home setting. For industrial productions, conching and tempering requires a heavy-duty machine and several days. At home, a heavy mortar and pestle and a bit of elbow grease will work. At this point, sugar and vanilla can be added.
Below is a website link which shows the different steps for ‘making chocolate’ at home. Or you can buy the best quality chocolate you can afford and make your dessert using the store bought. Fortunately, we can easily find locally made, first class chocolate on Hawai‘i Island!
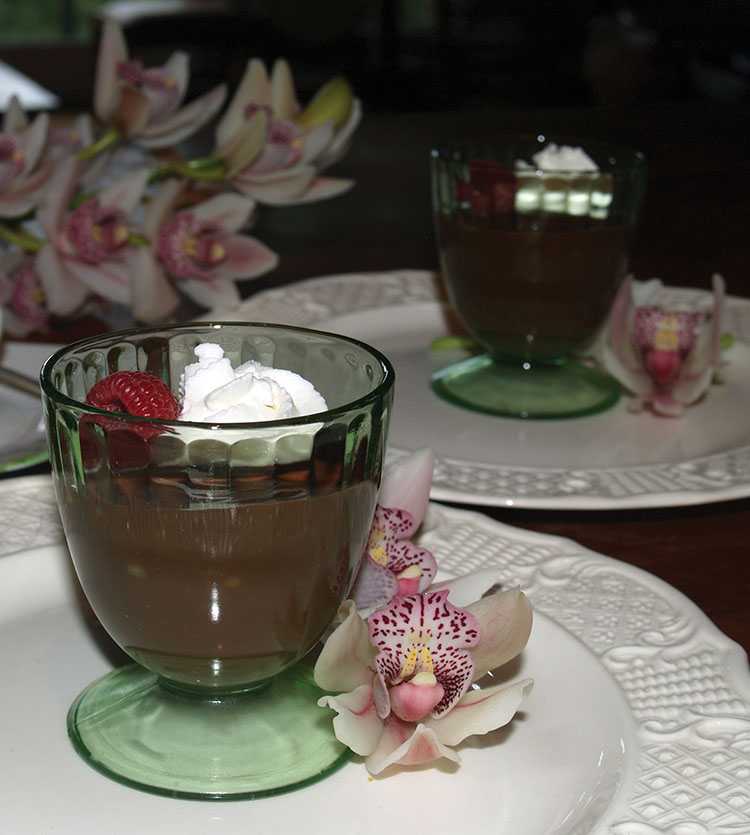
The following recipe is for traditional French custard typically served in little pot-shaped cups. It can also be served in demitasse, teacups, custard cups, or even glass stemware.
Original recipes can call for double boilers and baking in a bain marie. My friend Fran Morales McCully has simplified it into a three-step, less-than-5-minute process:
Step one: get all your ingredients together.
Step two: heat the cream.
Step three: Blend everything in the blender.
Voilà—you have an easily made fancy dessert!
Chocolate Pot de Crème
 10.5 ounces chocolate (the best you have)
3 yolks from large eggs
1-2 Tablespoons liqueur of your choice (optional)
2 cups whipping cream
Fresh fruit to compliment the chocolate flavor (optional)
Whipped cream for topping (optional)
Layer the chocolate, egg yolks, and liqueur (if using) into the blender.
Pour the cream into a large saucepan so there’s at least 3” between the top of the cream and the lip of the pan. Over medium-high heat, bring the cream to a boil until it climbs the wall of the pan; or you could heat it in the microwave. Remove from heat before it boils over and immediately pour into blender. Let it sit for 30 seconds then pulse to get cream moving. Once you have it swirling, blend until smooth. Immediately pour into the individual containers chosen. Cover with plastic and refrigerate for 3-4 hours until set. Serve with a dollop of whipped cream. (I like to serve some fresh fruit as well to cut the richness.) ❖
To make chocolate from scratch: Instructables.com/id/How-to-Make-Chocolate-From-Scratch/?ALLSTEPS
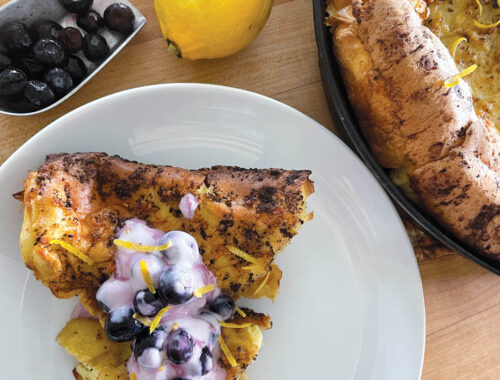
Recipe photo by Sonia R. Martinez
Enjoy the Big Island Chocolate Festival May 2-3 at Fairmont Orchid: BigIslandChocolateFestival.com
Contact writer Sonia R. Martinez: SoniaTastesHawaii.com
Sonia R Martinez
Sonia was born in Cuba and ended up living in Hawai‘i—from one beautiful island in the Atlantic to another beautiful island in the Pacific—with several years in between living in the American South. She lives in a beautiful rural rainforest area on Hawai’i Island where she enjoys growing herbs, collecting cookbooks, developing recipes, visiting farms and farmers markets, writing about food and cooking, reading voraciously, and working on crossword puzzles. Keep up with her adventures and ongoing love affair with Hawai’i by visiting her food and garden blog